This guide covers the operating of NLPI. It assumes that you have installed NLPI itself and the adventure example according to the installation instructions. The screenshots quickly give an overview of the capabilities of NLPI.
A context-sensitive help system is inherited from Zope and available by clicking the 'Help!' link on the right of the main frame.
This has been mentioned in the installation guide, too. To repeat: Select "NLPI" from the Product add list, give it a name and enter the full path to an icl file.
Note: It is important the +source_path and+code_path are set to the folder where the ICL file is located.
Press 'Play'. If a WinFrotz instance pops up, anything is ok. To see what NLPI has done while you wondered why it takes so long, scroll down the right frame. You should see something like that:
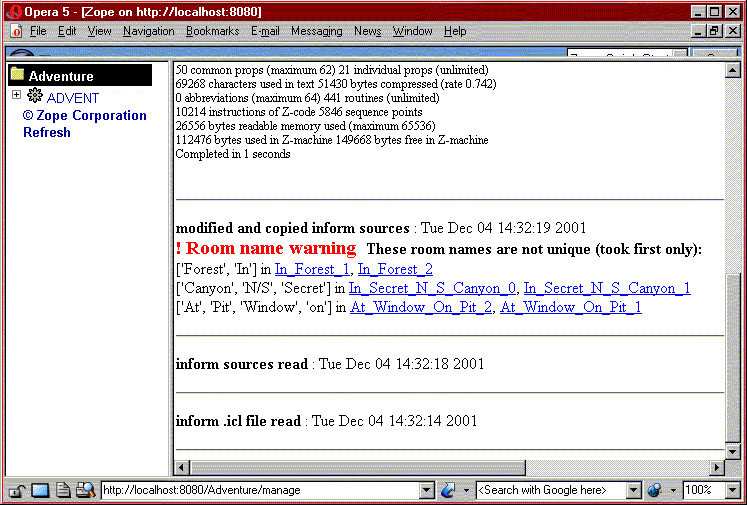
NLPI has searched your .icl file for filepaths, has extracted any objects out of your sources, has copied the files to a temporary directory, compiled them (hopefully without errors) and run winfrotz.
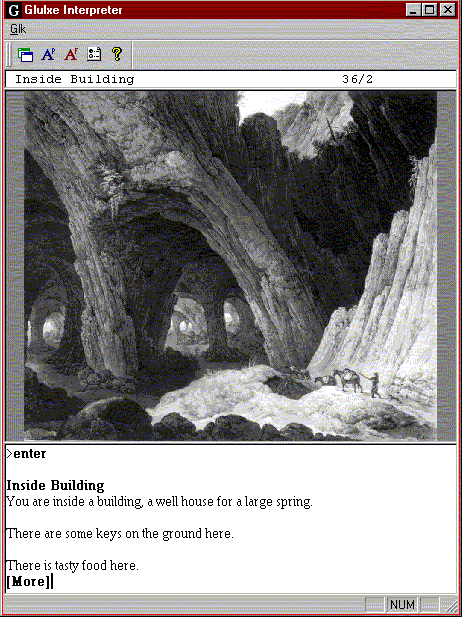
Now let's add a picture to your game. Go to the left frame (you need to reload it) and open the folder tree (which is a representation of the file tree). Click on outside_world.inf as below. Select "Inside_Building" in the "Available Rooms" selection list and enter the full path to a picture with its filename ending with ".jpg".
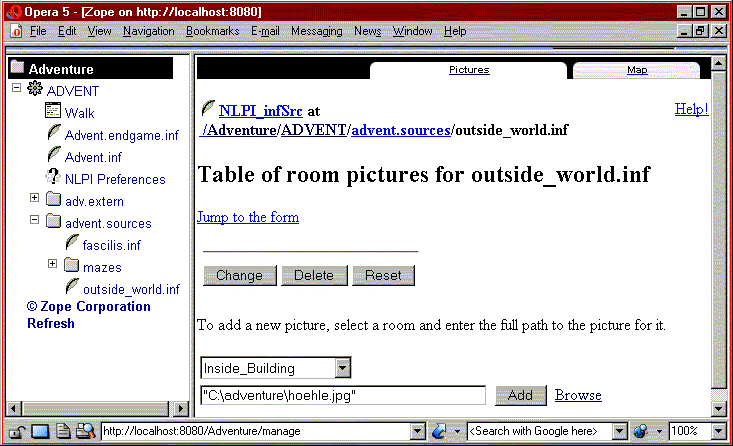
After having clicked "Add" you should see the picture in your window. Now return to the main NLPI console by clicking the top entry of your NLPI instance on the left frame. Click the "Options" tab on the right frame.
If you're using win95, you're pissed off: win32api is no more capable of translating the temporary paths created by Zope into DOS paths. Install Perl and use perlBlorb instead by selecting it in Options -> Blorb -> perlBlorb. You will need to adjust the binary path to perl.exe in Options -> Installation -> Perl interpreter on the bottom, too.
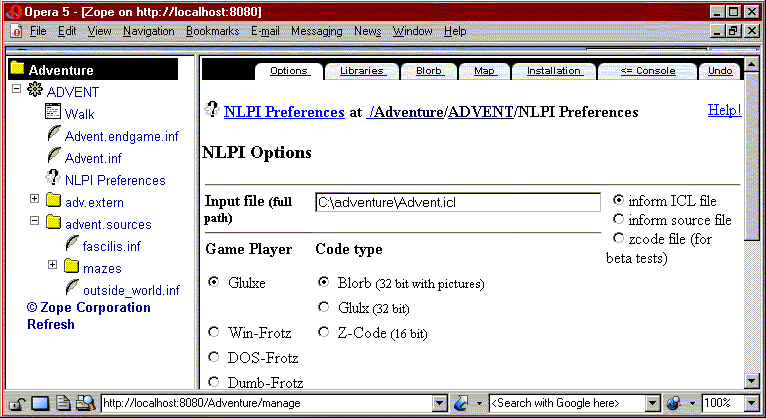
Select "Blorb" as Code type. If JavaScript is enabled Glulxe is automatically selected; otherwise select it by hand as in the screenshot. Press the 'Change' button on the bottom of the page.
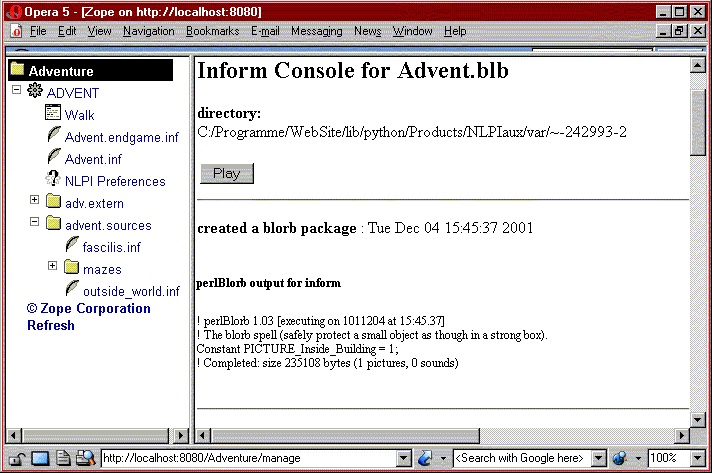
Return to the console by clicking the '<= Console' tab and press 'Play' again. NLPI should have created a blorb backage as below (perlBlorb on win95).
If everything is ok Glulxe should pop up.
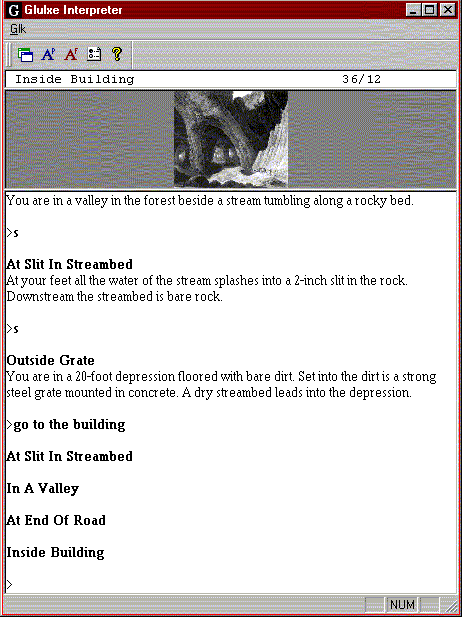
If you have used a big picture I recommend to type
>pictures tall
first.
Type
>enter
to get to the room "Inside_Building".
This is what you should see after cleaning your glasses:
You can try the following verbs:
>picutres small
>picutres tall
>picutres original
>picutres on
>picutres off
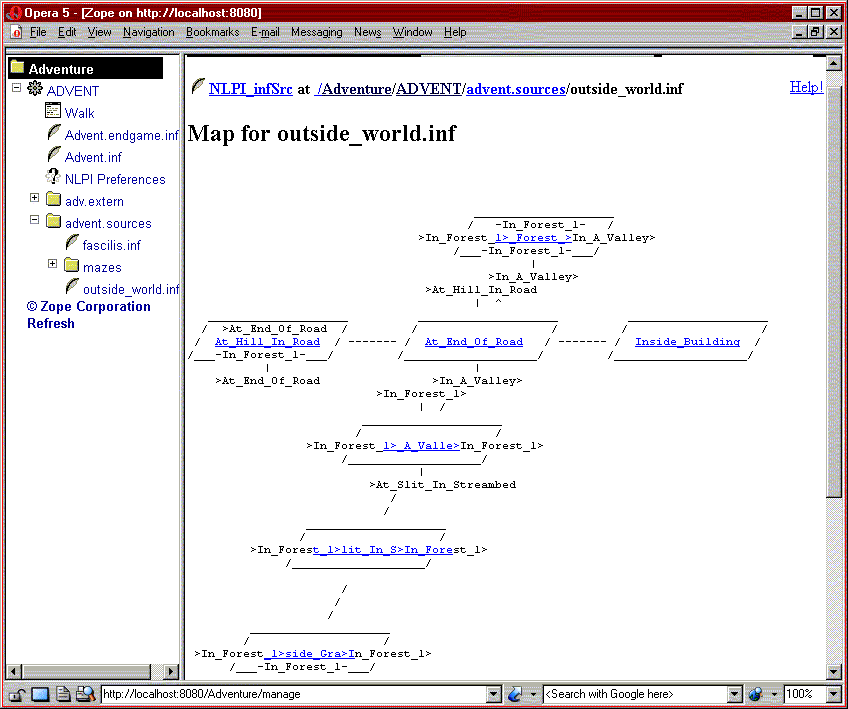
If you'd like to see a map of the game, just go to outside_world.inf again and press the 'Map' tab. Before you complain about the chaos try to draw it by hand ;-)
The room names are ordinary links. To see what they do, you must either use a German win32 installation and have NoteTab Pro installed on your harddisc, or you must adjust path and command line option in Options -> Installation -> Text Editor. You will be taken - most of the time exactly - to the room definition in your text editor.
You remember the room name warnings at the beginning? The links work the same way. But what are they for? Well, NLPI has introduced behind your back
This is important for real Magnetic Scrolls playing feel:
With
>go to a room
you can go to any room which you have visited before.
For that reason room names should be unique.
If you want to switch off this feature unselect it in Options -> Installation -> Enable Go To.
A last feature to show you is the Walk. This record-replay feature works even with non-debug zcode-games and is intended for testing purposes.
Go to the main console and select the 'Walk' tab.
Klick the 'Walk' button. You can now play your game
in the Zope command shell window as usual. Quit your
game with
>quit
(on winnt you can use <control> + Z instead).
Then press the "Refresh" link in your walk screen. There it is! Choose any location where you want to go with the radio buttons, as in the example and press 'Walk' again. There you go!
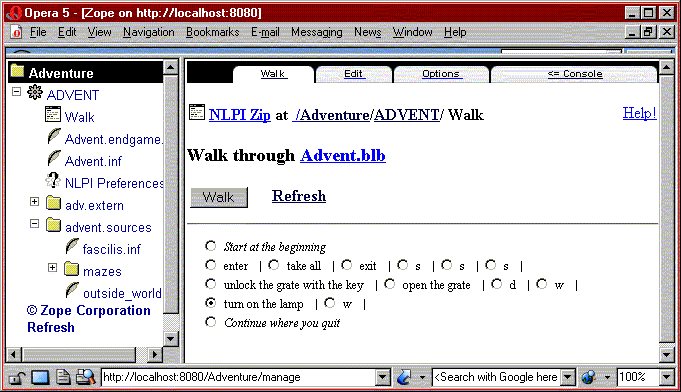
In the 'Options' tab of the Walk you can choose different output formats. 'Edit' is intended either to edit your walkthrough directly or to copy-taste it to your text editor.
Well, this was it. For further help press the 'Help!' link on the right of the main frame. By clicking 'Help Contents' you get to the non-context-sensitive help pages.
For those about to hack
We salute you...
Just open Znlpi_manager.py and set
Znlpi_resourcesDebug = 1
(around line 54) to see what NLPI does.
Well, you'll either have to restart Zope or to go to /Control_Panel/Products/NLPIaux, clicking the 'Refresh' tab and clicking 'Refresh this product'.
Copyright 2000, 2001 by Toni Arnold, Zürich
This is part of NLPI, copyright © by Toni Arnold, Zürich,
distributed under the
GNU General Public License GPL-2.
Last update: December 4, 2001